
Changing MacBook Pro’s Hard Drive
 Changing MacBook Pro’s Hard Drive: a reader asks…
I have a MacBook Pro (3rd gen) and did order that solid state drive to double my nearly full stock drive. I’d like to get the best solution to be time efficient in swapping drives out (There was some mention of putting some iOS drive swapping software on a thumb drive that would help the process along). In any event, I’d like to hear your approach to this task.
Since you have a 3rd generation MBP, the underside of your Mac has 10 Phillips screws. Older generations may have had a tab to remove the whole back, or just the battery. So you’ll need a small Phillips screwdriver and a small Torx screwdriver as well. There are several ways to do this, but the fastest method is as follows.
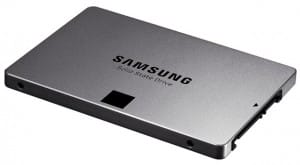
![]() The most time-efficient way means using a USB-to-SATA cable and some downloadable software and is only three steps: 1) Preparing your SSD, 2) cloning your existing hard drive to the new SSD and 3) physically replacing the hard drives. For step 1, you need a USB-to-SATA cable, such as this one from Amazon.com. For step 2 you’ll also need cloning software, such as SuperDuper (free trial available which is all you need for a one-time job). For step 3, you’ll need both a small Phillips and a small Torx screwdriver. Having a plastic spudger (pry bar) will also help. You can get this toolset from Amazon.com if you don’t already have these tools.
The most time-efficient way means using a USB-to-SATA cable and some downloadable software and is only three steps: 1) Preparing your SSD, 2) cloning your existing hard drive to the new SSD and 3) physically replacing the hard drives. For step 1, you need a USB-to-SATA cable, such as this one from Amazon.com. For step 2 you’ll also need cloning software, such as SuperDuper (free trial available which is all you need for a one-time job). For step 3, you’ll need both a small Phillips and a small Torx screwdriver. Having a plastic spudger (pry bar) will also help. You can get this toolset from Amazon.com if you don’t already have these tools.
Step 1: Connect your new SSD to the USB-to-SATA cable, and run the Disk Utility program.
- Select the SSD drive from the left-side list, and click the Erase tab.
- You’ll see that one box shows Mac OS Extended (Journaled), and a place for you to name the drive (it’ll say “Untitled” which you can replace with anything you’d like).
- Click the Erase button. This formats the drive to prepare it for use in your Mac.
 Step 2: Run the SuperDuper program, setting it to clone your hard drive to the SSD.
- On the main screen, the left-side ‘Copy’ should be your current hard drive, and click the right side ‘to’ and select the SSD you prepared above.
- Click the Copy Now button. This might take an hour or more.
When that’s done, eject the SSD and shut down your Mac.
 Step 3: Swap out the hard drives. This is pretty straightforward, Here’s how to do it for your third generation Macbook Pro:
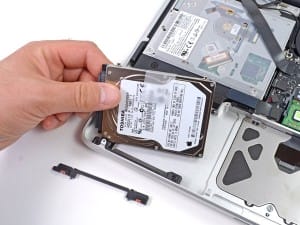
- Flip your Mac over, and locate the 10 screw holes, and remove them (using a Phillips’ screwdriver), then pry the bottom off of your MacBook Pro (either with your fingers or the spudgers).
- Locate the hard drive, remove two retaining screws and gently lift the hard drive up and out of the slot it sits in. Unplug the ribbon cable that connects the hard drive, and (using the Torx driver) remove the hard drive bracket or posts.
- Connect the new SSD to the ribbon cable (and bracket or posts), set the SSD into the slot, replace the retaining screws and replace the cover and screws.
Once you’ve completed these steps, you’re all done and you should be able to boot up your Mac and everything will be the same as it was before – except you’ll have more free space and your Mac should boot up and run faster with the new SSD!
This website runs on a patronage model. If you find my answers of value, please consider supporting me by sending any dollar amount via
") using any credit card (no Paypal account required), using Zelle, Apple Pay or Google Pay, or by mailing a check or cash to PosiTek.net LLC 1934 Old Gallows Road, Suite 350, Tysons Corner VA 22182.
I am not a non-profit, but your support helps me to continue delivering advice and consumer technology support to the public.
Thank you!
using any credit card (no Paypal account required), using Zelle, Apple Pay or Google Pay, or by mailing a check or cash to PosiTek.net LLC 1934 Old Gallows Road, Suite 350, Tysons Corner VA 22182.
I am not a non-profit, but your support helps me to continue delivering advice and consumer technology support to the public.
Thank you!There are currently 1277 reader comments on published articles, care to join in? Use the Leave a Comment form below/at the bottom of any existing comments. This is a good place to ask follow-on questions on this subject.


Hi Chris! I followed everything and happened to have the cable and tools. The process was easy to follow going on step at a time. Not only did it work, I’m really happy with the speed the SSD allows my workflow to occur. Thank you for taking the time to write up the detailed steps that ultimately saved on the cost of a new laptop!!!
I’m glad you were able to follow the steps Tom! Now you have a brand-new-like MacBook, congratulations!